Wednesday, August 31, 2011

Asian Chicken Lettuce Wraps


Lettuce wraps are one my favorite things.
Just as yummy as tacos, but no guilt with any of those empty carbs!

I love these at P.F.Changs, but every time I ate them, I thought "how hard can this be?".  Answer IS... not hard at all! 

You do need some Asian condiments that I hope that you already have on hand because they are awesome and I think that are a necessary kitchen staple.
They are...
  • Garlic Chili Sauce- called sambal.  You can find this at almost any grocery store in the Northwest area, and I hope elsewhere too.
  • Hoisin Sauce is nothing more than Asian BBQ sauce and is super yummy on grilled meats, so you can find lots of other things to do with it too.
  • Sesame oil... you have that, right?  If not, get some!!!!
I didn't make the sauce that PF.Changs serves with great fanfare, custom mixed, at your table.  Here's what it is, Chinese mustard, sambal, soy/vinegar mix.  Yup, that's all.  My chicken (or turkey) wraps are spicy and flavorful enough that you don't really need the drippy sauce.  If you are not a spicy fan, use the lower amount of spice shown below.  I also had Sriracha hot sauce on mine, because it's almost never spicy enough for me.

I've never tried making these at home with tofu instead of turkey or chicken as a vegetarian option, but I think it would work out.  I like the tofu wraps at P.F.Changs almost as much as the meaty ones.  I'd use extra firm tofu chopped small. 


(Water Chestnuts not shown)


Serves 4-6
Ingredients
20 oz pkg ground chicken, or turkey
1 6oz. can water chestnuts, chopped
2 tsp fresh ginger, grated
3 garlic cloves, smashed
1 jalapeno, seeded and minced (optional)
1 rib celery, minced
1 bunch green onions, thinly sliced
1/2 white onion, minced

1/2 cup hoisin sauce
1-3 Tbsp garlic red pepper chili sauce (sambal)
2 Tbsp rice wine vinegar, or white vinegar
3 Tbsp soy sauce
2 Tbsp sesame oil

Serve with:
Iceberg lettuce "cups"
green onions
chopped peanuts
fresh cilantro springs
Sriracha

Brown your chicken or turkey over medium high heat in a tablespoon or two of sesame oil.  Use a flat edge utensil to keep the meat into small bits, as you want an even texture, not big chunks, as it cooks.  I don't bother draining off the liquid from the cooking, it's mostly water and broth and not much fat.  I add the chopped veggies; celery, jalapeno, water chestnuts, green onions, garlic and ginger. Cook for 1-2 minutes, but don't overcook, you want some crunch in those veggies.

Add the sauce ingredients and cook for a couple more minutes as the sauce reduces and thickens a little bit.  Turn off heat and let cool a little bit.

Serve on lettuce leaves, heaped with meat and then topped with more greens onions, cilantro and chopped peanuts.

This is a somewhat messy dish to eat... but very satisfying!!!

Here's some other yummy Asian dishes that you might enjoy!

Larb Gai is almost the Thai equivalent to Lettuce wraps, but different flavors and usually served on cabbage instead! 
Larb Gai
Spicy Thai Prawn Skewers
Thai Chicken Nachos
Vietnamese Spring Rolls

Tuesday, August 30, 2011

Salted Caramel Toffee


Yum, this came about as a delicious accident. 

I was trying to perfect the caramel for my Millionaire's Shortbread, which is one of my most popular recipes on my blog!
I had to do it three times....
Once was too soft, once was too hard and finally, one was just right. 
The hard one was delicious, it just wasn't right for the layered cookies, but it was perfect for savoring on it's own.  This toffee has a crunchy start and a chewy finish, and probably is something that your dentist would never approve of. 

If you don't want Salted Caramel, just omit the salt.  Easy, huh? Everyone I gave this too, especially liked the saltiness, but frankly, either way makes me gloriously happy.

Some recipes for English toffee say to get the temperature to 300 degrees, but I think that 250 works for this.  If you decide to take it to the 300 degree mark, watch it carefully, I felt that mine was a bit close to burning at 250. 


Makes about a pound of candy.
Ingredients:


Salted Caramel:
1 cup white sugar
1/2 cup brown sugar
1/2 cup corn syrup
1 1/2 cup whipping cream
1/2 cup unsalted butter
2-3 tsp crushed sea salt


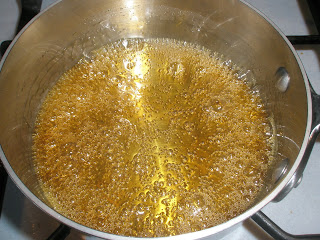
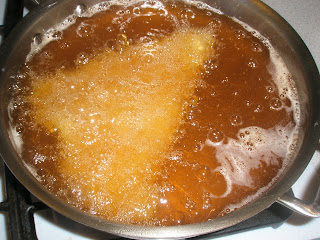
In a big heavy pan, it needs to hold at least 3 qt so your caramel doesn't bubble up and over the top.  That would... make ... a ... mess!!!

Add a candy thermometer to the side of the pot.  Add the sugars, corn syrup and cream and turn the heat to medium and cook until it is bubbly and the sugars are dissolved.  Add the butter and bring the heat up to medium high. 


Keep stirring and keep an eye on the temperature. 


You will want to get your caramel to 250 degrees.  At that point, remove from the heat and add the salt.  I used 2 tsp of the sea salt.  Start with 2 tsp and carefully taste (let it cool on your spoon for a minute) as sea salts do vary in how salty they are.

On a small sheet pan, line with parchment paper, wax paper, silpat or just butter the bottom. Pour the hot caramel toffee on. 


Let cool for a couple of minutes, and using a large knife, score (make cuts without going all the way to the bottom...) it into pieces.  Let cool completely.  Put in the fridge or freezer for 5 minutes and then break into shards using a mallet or a heavy spoon.  Keep in airtight containers, or put right into small gift bags.

Saturday, August 27, 2011

Baked Eggs with Ham, Cheese & Herbs


These are EASY...
So easy. 
They even taste like you did something exotic and gourmet to them.

Baked eggs are sometimes called Shirred Eggs... but I don't think most people know what Shirred is, so I am going with Baked Eggs.  This was easy, but I did manage to overbake the eggs.  I get a bit grossed out of runny egg whites, so in my efforts to make sure that there were no icky whites, I did manage to over do the yolks too.  Just don't over do it... really, it's going to work out and you will impress your family, or whoever you are feeding this morning.

When these come out of the oven, they are HOT, so they will need to rest for about 4-5 minutes, and remember, they will be cooking the whole time they are resting too!  Use a shallow individual dish, and not a deep one like I show in my picture, because it was a bit tricky to eat them safely out of that cute little dish.
Of course, I did serve them when they were still molten hot at my house...
Why am I so impatient? 
Maybe just hungry... and eager... oh yeah, and impatient too.


Butter, softened
2 eggs per ramekin
2 thin slices of ham 
2 Tbsp cream,
2 Tbsp cheese- Parmesan, Asiago, Cheddar- whatever you like & have on hand
1-2 tsp of mixed, minced herbs- chives, thyme, basil, parsley

Heat oven to 375 degrees F.
Butter 4 ramekins with the butter.
Lay 1 slice of ham in each ramekin so that it sits flat on the bottom and comes up the sides.  Crack 2 eggs into each ramekin so that the eggs sit side by side on top of the ham slice. Season lightly with salt and pepper. Repeat with remaining eggs. Place the 4 filled ramekins onto a baking sheet and transfer to the oven. Bake until eggs are just beginning to set up and become opaque, 9 to 10 minutes

.
Remove from the oven and sprinkle the eggs with mixed herbs, then drizzle each ramekin with 1-2 tablespoons of the heavy cream and then sprinkle 1-2 tablespoons of the cheese over the top of each. and then return to the oven.


Cook until eggs are just set up but yolks are still runny, 5-6 minutes, or just about to the desired degree of doneness. You could broil the tops to get the cheese to brown, if desired.  Let sit for about 5 minutes to cool slightly before serving.  They will continue to cook while they are cooling. Serve immediately with toast for dunking.

Friday, August 26, 2011

Good Night Irene Cocktail


Listening to all the news reports on tv, online and radio, we're all freaked about the hurricane.

I was laying in the sun, 3,000 miles away from the threat, but thinking of what it might do.  I loved that the media had used the title "Good Night Irene" from the folk song, a song I've always loved.

How to make a cocktail in honor of bidding Irene adieu?
Well, first, it needs to be "on the rocks".... don't you think?
It started in the tropics, so maybe something with orange, hmmm, let's say Grand Mariner.
Now what goes with Orange? 
Well... chocolate does, so let's add Creme de Cacao chocolate liqueur.  
Orange seltzer, Orange vodka, and little citrus simple syrup.
Hmmm, tastes good, but needs a little something.
Bitters!
Yup, Irene is a bitter pill to swallow and it was just the thing to make this one.

This is a sweet cocktail, so probably you will like it best after dinner, right before you put Irene to bed... umm, I mean yourself to bed.


1/2 jigger of creme de cacao (on the bottom)
1 jigger orange vodka
1/2 jigger citrus simple syrup (*optional)
2 jiggers orange seltzer
2-3 shakes aromatic bitters
1/2 jigger Grand Mariner liqueur (floated on top)
1 broken up drink umbrella

In a double old fashioned glass (which is more stable in a hurricane) add ice, layer it all up in the order listed, adding a turned inside out umbrella as a garnish.

*If you don't want it too sweet, you could leave out the citrus simple syrup.

Enjoy, repeat as necessary!

Coconut Flan


I've been making this for years and it's become a family favorite. It's a soft, rich taste that appeals to everyone.  In fact, when my daughter heard I made this yesterday, she started whining into the phone as she is too far away to come get the leftovers. 

It's so darn simple that it's ridiculous.  It took me longer to write about it then it did to actually make it.

The hardest part is making the caramel out of sugar and water.
Yep. Not hard at all, except I did manage to burn mine, so I do have some advice for you below. The ladies I served it to last night loved it, and assured me that it was not burnt, so even if you don't do it perfectly, you are still going to have a great dessert.

When caramelizing the sugar, use a small, heavy saucepan.  Swirl the sugar water mixture over medium high heat, it takes a minute or two for the sugar to melt, and another couple minutes for the sugar to start to turn amber color.  That's when you want to pull it off the heat, because the mixture is so hot at this point, and your pan is still cooking it, your caramel will continue to brown.  That's where I went wrong, I took it off the heat when I liked the color... and that mixture kept on getting darker.  I was really annoyed with myself... I may have said some choice words about it.

Also, I have used a ring springform pan, and Mexican Flan's are mostly served in a ring shape, BUT, you can make this in any kind of pan!  A springform cheesecake pan, but even a pie plate would work.  If you use a springform pan you MUST cover the outside with foil to protect the mixture from getting OUT of the pan and the hot water from getting INTO the pan. 
Do NOT skip this step or you will have a mess...
Make sure your pan is deep enough so that you can add water around it.  You need to cook this dessert in a 'bain marie'... which only means you cooked it with water around it to keep the heat consistent and didn't cook it from the outside inwards... which would make the texture weird with all the eggs.
 

¾ cup sugar
2 Tbsp water
1 can (15 oz) coconut milk
1 can (14 oz) sweetened condensed milk
1 can (12oz) evaporated Milk
6 eggs, lightly beaten
2 tsp. vanilla

*** I made this with light Coconut Milk and lowfat evaporated milk with great results!

Heat Oven to 325 F.

In a heavy saucepan, combine the sugar and the water and melt over med low heat until the sugar turns an amber color. 


Pour the caramel into the bottom of a large baking pan. Mine is a little dark, but it turned out okay.


Whisk together cream of coconut, and other canned milks, eggs and vanilla. 
I even used my blender for this step... talk about easy!

Pour mixture into pan, place that pan in another pan with hot water poured around it, bake for approx 40 minutes. It's best if you pour the hot water in the pan around your flan after your pan is already in the oven on the rack, less slooshing about.
 

Cool and cover with plastic.  Chill in the fridge for 3-4 hours.
Before serving, loosen the outside of the dish by running a sharp knife around the edges.  Invert the pan onto a serving tray.

Thursday, August 25, 2011

White Wine Sangria


Well, Summer is finally here in the Pacific Northwest.  You know what that means?
Right...
Get out there and enjoy it, because usually Summer is one month long up here and that month is almost over.


This is a great and refreshing beverage for a hot day, and very easy to make ahead too.  I liked the flavors of the Grand Mariner with the wine and citrus, but you could use any orange liqueur or Triple Sec.  I just happened to have Grand Mariner on hand... because it is my favorite!

A friend gave me the original recipe, which sounded great, so as usual, I made some simplifications and here it is. I tried to find the original recipe online to link to, but it does not seem to be out there.  The book is The Life of the Party and it was called Garden Sangria.  Garden Sangria.... sounds very fancy! Doesn't it now?
I kind of like Beach Sangria, or maybe Deck Sangria, or even Dock Sangria. 
Garden? 
Sounds like I might need a hat and behave very, very well. 
Usually I am well behaved, but not always... not always...


This makes quite a lot... but the original recipe says it serves 20!
20?  You mean like 2- 0???
Surely you jest...

1 orange, sliced
1 lemon, sliced
1 lime, sliced
1 cup vodka, preferably lemon vodka
1 cup Grand Mariner, or Orange Curacao
1/2 cup sugar, or citrus simple syrup
2 bottles dry white wine
4-6 cups orange seltzer, or club soda

Slice up the citrus, removing the ends. Remove any seeds, because they don't taste good.
Add the fruit to the bottom of a large pitcher. Add the vodka and the orange liqueur. Let sit for a couple hours (if you can, but I did not).  Stir in sugar, or better yet, make a simple syrup from the citrus ends and 1 cup of sugar and 1 cup of water. Simmer for 10 minutes and strain. Now you've got a great simple syrup to use that has more flavor than plain ole sugar.


Add the wine, prefereably already chilled.  Add chilled seltzer and serve.  Add the ice to each glass and pour.  Don't add ice to the whole mixture, it will be too diluted! It would be better to put the pitcher ON ice instead.

Hey, if you need other inspiration... here's some more ideas using the base recipe above:
  • Add sliced peaches instead of citrus, use raspberry or peach vodka & seltzer.
  • Fresh Watermelon chunks would be great too, maybe add Watermelon "Pucker" liqueur instead of Grand Marnier and regular vodka.
  • Blackberries are in season right now, add Blackberry vodka, I think Stoli makes one.
  • Red Wine, you say?  I think this recipe would be just as nice with RED WINE too!


Also, if you need more inspiration, here is another great Summer time party drink:


Wednesday, August 24, 2011

Southwestern Seafood Chowder


My Mom says I put corn in everthing.
Now you and I know that isn't true, but I do like corn.
I guess that's why I liked this Southwestern Seafood Chowder when I saw it! 
The corn, of course! 
Oh yeah, I guess I like halibut, prawns, tomatoes, etc. etc. 
About the only thing I don't really care for is the clams, but minced clams in this are really hard to find objectionable.  
 

This recipe was in Food & Wine in March 2011 but it was way to fussy and complicated, so I changed it up a bit.

Sorry in advance, I didn't take very many pictures of making this dinner... not sure why, I guess I was trying to do too many things at once again. Anyways, its pretty easy to make and serve to a crowd.  I served it to 6 of us and we had tons and tons of leftovers, so I really think it would be easy to feed 10 from this recipe.  It wouldn't be too hard to halve this recipe, but really, just make the whole batch and have a party... watcha waitin' for?

(Not shown- 2 cans of minced clams and 2 ribs celery)

Serves 8-10
Ingredients
1/4 cup canola oil
1 yellow onion, coarsely chopped
5 garlic cloves, smashed
2 large ancho chiles, seeded and torn into large pieces
   (Or, 2 fresno chilies and 1 anaheim which is what I used)
1 teaspoon fennel seeds
1 cup dry white wine
One 28-ounce can crushed tomatoes
1/2 cup cream
2 6oz. cans of minced clams, with juice
Salt and freshly ground pepper
1 pound Yukon Gold potatoes, cut into 1/2-inch pieces
1 small red onion, finely chopped
1 celery rib, finely chopped
1 fennel bulb, finely chopped
One 10-ounce package frozen corn kernels, thawed
1 1/2 teaspoons smoked sweet paprika
1 tsp chili powder
2 Tbsp Frank's Red Hot Sauce (optional)
1 pound skinless halibut fillet, cut into 1 1/2-inch cubes
1 pound shelled and deveined medium shrimp
In a large pot, heat 2 tablespoons of the oil. Add the yellow onion, garlic, ancho chiles and fennel seeds and cook over moderate heat, stirring frequently, until the onion is lightly browned, about 8 minutes. Add the wine, the crushed tomatoes and 4 cups of water and bring to a boil. Cook over moderate heat until the vegetables and anchos are very tender and the broth is slightly reduced, about 15 minutes.
Working in batches, puree the soup in a blender. Return to the pot.

Add the potatoes and cook over until almost tender about 15 minutes.  Stir in the red onion, celery, chopped fennel and corn. Add the cream, paprika and chili powder.
Add the cans of minced clams (including the liquid), halibut chunks and shrimp to the soup and simmer until the halibut is white and the shrimp are pink, about 5 minutes. Season with salt and pepper and Frank's Red Hot, if needed. Serve the soup in shallow bowls with oyster crackers or crusty bread. Garnish with some of the chopped fennel fronds, it you like.

Here's a couple more of my favorite spicy soups:Albondigas, Mexican Meatball Soup

Chicken Fried Steak with Bacon Cream Gravy


Wow... I am exhausted. 
I've been wanting to make Chicken Fried Steak for my husband for a while.
I had NO idea that... it... was ... THAT... MUCH... WORK.

Talk about a labor of love, I'm not going to sugar coat this folks, you may be trying to please someone, but be prepared for give your heart, soul and your hands for this one. I made three guys very, very happy tonight with this meal.

By the time my husband got home, I was already sitting at the dinner table with two teen boys starting on our meal as it was pretty late and we knew he'd be walking through the door momentarily.
One of the first things my husband said to me is "Wow, looks like you got some SUN today!". 
What?
I didn't get any sun, I was slaving in the kitchen!!!
What you see is a hot, sweaty girl... but I am thrilled you think I am recently sun-kissed anyways.

Also,
My hands hurt... I have a huge blister on my right finger from pounding, smacking and tenderizing that Top Round beef.  Geez, had I known, I would have bought a more tender cut.

I also feel greasy from frying bacon, then meat, and then making a disgustingly fattening (and delicious) gravy.  Does it help that I gave everyone green beans and corn on the cob instead of biscuits and potatoes??? I like to think so...

Are you still here?
What?
You want to try it anyways?
I like that about you....


(I should have also pictured 2 eggs & paprika)

Serves 4
Ingredients
2 lbs. top sirloin, or round steak, cut then pounded to about 1/3 inch
Mix the following seasonings together and sprinkle both sides of the meat generously.
(Any leftover spices can be used in the flour for breading below)
1 tsp salt
1 tsp garlic powder
1/2- 1 tsp cayenne
1 tsp black pepper

2 cups flour
1 tsp salt
1 tsp garlic powder
2 tsp smoked paprika
1 tsp black pepper

2 eggs
3 Tbsp milk or cream

Bacon Cream Gravy
1/2 lb bacon, cut into 1/4" inch pieces
1/2 large white onion, minced
1/3 cup leftover flour from above
1 1/2 cup milk
1/2 cup cream
1/4 cup green onions, sliced thinly

First, cut the beef into about 1/2 inch thick slices... better yet, have your butcher do this!


Then taking your mallet, pound it to about 1/4 or 1/3 inch... this took me a longer time than I anticipated. Season both sides of the meat.

In a deep fry pan, fry the bacon pieces until crisp. Drain the bacon on a paper towel.  In the same pan, drain off all but 2-3 Tbsp of bacon grease. Saute the minced onions until translucent and starting to take on some color. Set pan aside, this will be used to finish your sauce.


For the breading, take 3 deep plates or small pans, fill 2 with seasoned flour and one with the beaten eggs and 3 Tbsp of milk.  Flour each piece of meat, then dip each piece in the egg mixture, ending in another dredging of floor.

Fry each piece in about 1 inch of good oil, like peanut oil, or vegetable oil over medium high heat.  My pieces of meat were so big I had to do one at a time. 


Drain each piece and keep warm in a low oven.


Now make that gravy!

Using some of the leftover flour from dredging your meat, add about 1/3 cup to the bacon grease and onion mixture.  Cook over medium heat for a couple minutes, slowly add 2 cups of milk, cream or mixture, whisking as you go.  It should start to thicken right away.  If it gets too thick, add more milk, or a little water to thin to the consistency that you like best. Adjust seasoning by adding salt and pepper as needed. This dish is best if the gravy is well seasoned!

Top each fried piece of chicken fried steak with lots of sauce, a sprinkling of bacon and some minced green onions.  Ideally, you would serve this with some hot flaky biscuits...


Tuesday, August 23, 2011

Pepper, Peach & Rosemary Jam


I should probably apologize in advance for being a rule breaker.
When I see a recipe, I blatantly blaze my own path with their inspiration.
I mean really, if 1/2 tsp of pepper is good, isn't 1-2 tsp of pepper better?
I think it is...
Peaches, Pepper, Rosemary? Oh yeah, count me in...

I was inspired by another blog post on a site I like called Punk Domestics. I met this guy in at a Meyer Cookware event in San Francisco, and he was a wealth of information of all things "preserving"... but let's just say that "punk" wasn't the first thing I thought about him.  The dude was smart, and I check his site often, but punk didn't make the cut with me. I'm not yet into making my own charcuterie, but maybe someday...  
I couldn't tell if this recipe was a fellow blogger*** recipe, or his own, but the site gave credit to Martha Stewart.  Of course, I changed the recipe... because I felt like it... and because I can! Martha won't mind.

I'm loving the idea of serving this jam to my writer "foodie" friends on Thursday with some goat cheese and crackers.  Geez, I'd better get going on homemade crackers... I can't use Triscuits with these ladies. 
Well, I could... but maybe it's me that doesn't want Triscuits with this.


This recipe only makes 5 - 1 cup portions... I might double it next time! I canned two pints (2 cups each) and put the rest in a fridge jar.

***P.S. On further research, I see that this is another blogger named Karen... awesome job Karen!
***P.S.S. I gave my husband the cracker I photographed while he was talking on the phone to his buddy, he said "wow" while he was eating it.  Nice, huh? He doesn't even like jam...
***P.S.S.S... it's 6am and I'm getting ready to post this recipe, and I just ate some of this jam on plain greek yogurt.  I sure hope the rest of my day is just as marvelous.


makes 5 half-pints
Ingredients
3 pounds peaches, yellow or white, (do what you like!)
1/3 cup lemon juice (I used 1 1/2 lemons, juiced)
2 tsp. lemon zest
3 cups sugar
4 large sprigs rosemary
1-2 teaspoons coarsely ground black pepper

Peel and pit the peaches. (Very ripe peaches are very easy to peel with a knife.  If your peaches do not peel easily, they are probably not ripe enough.  If you must make the jam without allowing them to ripen further, you can boil them for one minute, then plunge into cold water to loosen the skin.)

Slice the peaches into 1/2 inch slices/chunks.  Place peaches in a large pot, add lemon juice, sugar, rosemary, and pepper.  Cover and let stand for 4 hours in the same pot that you intend to cook the jam in.  Stir every hour to incorporate the sugar.
(I didn't do this, I let them all sit together about 30 minutes... I am so impatient.)

Bring to a boil over medium-high heat.  Cook for 15 minutes, until mixture is syrupy.  Lightly mash the mixture to break down peach slices, leave about 1/3 of wedges intact. 


Discard rosemary sprigs, discard the big pieces but let a couple of green pieces in for color and interest.

Ladle jam into hot sterile jars.  Leave a 1/2 inch head-space. Top with a new lid and band. Process in a hot water bath for 10 minutes for half-pint jars.  "Google" Home Canning Basics for more information about the canning process if you've never done it.

This makes an awesome appetizer with a glass of wine and a little goat cheese on a cracker!

Monday, August 22, 2011

Orange, Fennel, Ginger & Arugula Salad


Refreshing, crunchy, tangy, peppery... great flavors to enjoy on a Summer day. 
This is such a simple salad, I am not sure why I didn't do it sooner.  Fennel is crunchy with a mild anise flavor that lends itself to many other fruits and veggies.  It's pretty easy to find, at the grocery store (Trader Joe's sell it in a 2-3 pack without the tops) and farmers markets too.

I like fennel because it's so versatile, it's equally great braised with your pot roast or served fresh in your salad. It's my new favorite.

I found this recipe on "O" Oprah.com, but there are many, many versions online.  I liked this one best because it had the ginger in the dressing, but the salad would be equally yummy with a honey mustard of poppyseed dressing.


Servings: Serves 4
Ingredients
2 tablespoons fresh lemon juice
2 Tbsp orange juice
1 piece (2 inches) fresh ginger, grated (about 2 teaspoons)
1/4 cup olive oil
1/4 teaspoon salt , plus more to taste
1/4 teaspoon freshly ground black pepper, plus more to taste

4 cups baby arugula
2 oranges , skin and pith removed, sliced crosswise into 1/3-inch-thick circles
1 large fennel bulb , trimmed and very thinly sliced
1/2 red onion, sliced in rings

Directions

Peel the oranges by cutting away the rind with a sharp knife.  Lots of juice is still attached to the rind, so I give it a little squeeze to use those juices for the dressing.  Slice the oranges into rounds.


Cut the top, and the core off of a fennel bulb.  Retain some of the green fronds to chop up and use to garnish the salad, it tastes great.


Cut in half and slice thinly.  I recommend a food processor to make short work of it, and give you consistent cuts.


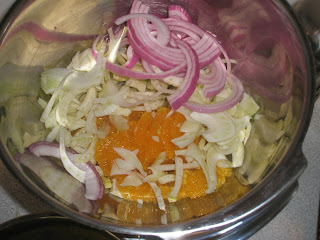
In a small bowl, combine lemon & orange juice, ginger, olive oil, salt, and pepper. Mix well. Set aside. In a large bowl, add the arugula, and layer on top the orange, red onions and fennel; drizzle with dressing. Season with additional salt and pepper before serving.

I did mine ahead of time, but didn't want my arugula to get wilted, so I added dressing to the orange, fennel and red onion mixture to marinate while I waited.


Saturday, August 20, 2011

Blackberry Raindrop- A Northwest Martini


"MMmmmm" he said, "it tastes like blackberry cobbler..."  .
His eyes were closed, his face happy, which was needed after an hour and half commute on Friday night. We meant to have only one... but felt the need to try some variations too. 
The things we do for you....

It all started with a drink menu in a bar which I looked at right as we were leaving.  I love looking at the 'speciality' drinks for new combinations and inspiration.  This place had a martini called a "Huckleberry Raindrop".  While I thought that was clever, especially the name, I wasn't keen on going out and buying a special Huckleberry liquor in order to make it home.

I started thinking about all the crazy blackberry bushes trying to take over my own backyard, why not make something with those?  If you are from the Northwest, nothing says home more than blackberries and rain!  There is only a small window of time in August where you actually like blackberries and the rest of the year, you are consumed with eradicating the bushes/vines from your life.  Machetes, Herbicides, Goats.... whatever it takes to make them stop taking over your life and sneaking up on you when your back is turned.  The least those things can do is to make you happy with some succulent fruit once a year, so seize the moment. If you don't live somewhere where you can pick your own blackberries, by all means, buy them... do not, I repeat, ever plant them. 

I wanted to make a Blackberry infused vodka, but that takes too much time, about 8 weeks.  8 weeks?  Are you crazy? I want to enjoy this now, in August, when I can see the blackberries on the vine and feel the sun on my face.  So it had to be an intense blackberry simple syrup. This is an easy way to get the flavor, color, tang and sweetening in one fell swoop.  It's so easy, you can make this afternoon and have it ready by cocktail time.

One last thing... this syrup would be incredible in Iced Tea too!


Blackberry Raindrop

1 1/2 jigger of vodka
1 jigger blackberry simple syrup
1-2 Tbsp of lime, or lemon juice

Pour over ice cubes in a cocktail shaker, give some good shakes and strain the mixture into your glass. Garnish with some fresh blackberries.

Simple Syrup
Makes enough syrup for about 8-10 drinks.
1 cup water
1 cup sugar
2 cups blackberries
1 lemon, juice and zest

Wash the berries.


In a small sauce pan, heat the water, sugar, blackberries, lemon juice and lemon peel to a boil.  Turn down the heat and simmer until the berries break down and the mixture starts to thicken, about 15 minutes.  Strain the mixture through a sieve and discard the berry puree and the lemon peel.  Pour into a bottle and keep in the fridge.


Variations
-Grapefruit vodka instead of regular, does change the flavor, but also good.
-A little float of soda water would add some sparkle and lighten the drink up too.
-"Whipped" Cream vodka (which is so good!) would also be good, but a much sweeter drink.  Maybe just a tiny float of the whipped vodka on the top before serving.
-Vodka Tonic on ice with a small amount of blackberry syrup at the bottom would be refreshing on a hot day.

Friday, August 19, 2011

Strawberry Jam (no pectin)


Strawberry jam, isn't it everyone's favorite?  

I love jam, but have never liked the really thick, "hard" jams and jellies with too much pectin in them.  While pectin is a naturally occuring substance, I just don't like it. I prefer to make my jam without it.  Not using pectin has given me some issues though, because some fruits have very little 'jelling' ability without the added pectin.  Strawberries are one of those fruits, but I found this great article online that explained how to get around this without cooking your jam to death.  Here's the original article in Cincinnati Locavore. I changed a couple things, because I felt that the ratio of sugar to fruit should not be equal and the end product would end up too sweet.  One important thing I learned from the article is that strawberries with some green on them actually have the naturally occuring pectin that will help it to jell up and thicken, so go ahead and chose some berries with a little green bits. It can be a bit of an extra step to strain your berries out of the jam part way through, but it really wasn't that bad. I also think the jam has a nicer color and fresher "realer" taste than so many jams.

I bought my strawberries at Costco in a 4lb pack for $5.99.  I thought that was a pretty good deal to make 8 jars of jam, even adding in the price of 6 cups of sugar and the lemon.  If you buy that nasty jam at the supermarket, it is actually pretty darn expensive, so do yourself a favor and make some jam this year.  Even if you invest in a canning 'set' which includes the jar tongs (very helpful) and the filling funnel, it is worthwhile, and satisfying, to make your own jam.

About 8 8-oz jars of preserves

8-9 cups of Strawberries, a few slightly unripe, slightly mashed (approx 4 lbs.)
6 cups sugar
Zest of 1 lemon
Juice of one lemon

Fill canning kettle with water to cover 1/2-pint jars by 2 inches, cover, bring to a boil, and keep it there.

Set 1/2 pint (8-oz) jars and lids into a pan of hot water over lowest heat. You'll need 1 jar per cup of mashed berries.

Wash and hull strawberries.  You actually want berries that have some green on them,  those berries still have natural pectin in them!


Mash about half the berries, leaving some in slices in an extra large heavy non-aluminum pot. Add sugar to the partially mashed berries and bring to a full rolling boil 5 minutes, stirring constantly to prevent the sugar from sticking and burning. Remove from heat and strain through a sieve into a bowl, allowing syrup to drip through sieve for a few minutes.  Be SO careful it is hot and sticky and will give you a painful burn if it splashes on you.


Set the sieve aside, return syrup to pot, add lemon juice and zest, and bring to a boil, stirring constantly and boiling on high heat until candy thermometer reads between 220 and 222.  You need to stay right there and stir and watch, do not leave unattended.

You can see that I should have used a deeper pot, this mixture almost went over the top... which would have been a major mess!


Return contents of sieve to pot and return to a full rolling boil, stirring constantly. Remove from heat and ladle into hot 1/2-pint jars, leaving 1/2" headroom. Wipe jar rims with damp cloth, cover with hot lids and screw on lid rims without tightening. (The lid rims are only there to hold the lids in place during processing; tightening them can both interfere with processing and cause you to dislodge the lids when removing the lid rims before storing your preserves.) Set jars into canning rack and drop into boiling water in kettle. Cover kettle and process 10 minutes, remove from water, and set on rack to cool. Once cool, check seals (press gently in the center of the lid -- if you feel a slight pop and the center flexes down and then back up again, the lid didn't form a seal and that jar should be refrigerated and used within six months), remove lid rims and label.